Build guide
Green Man mask
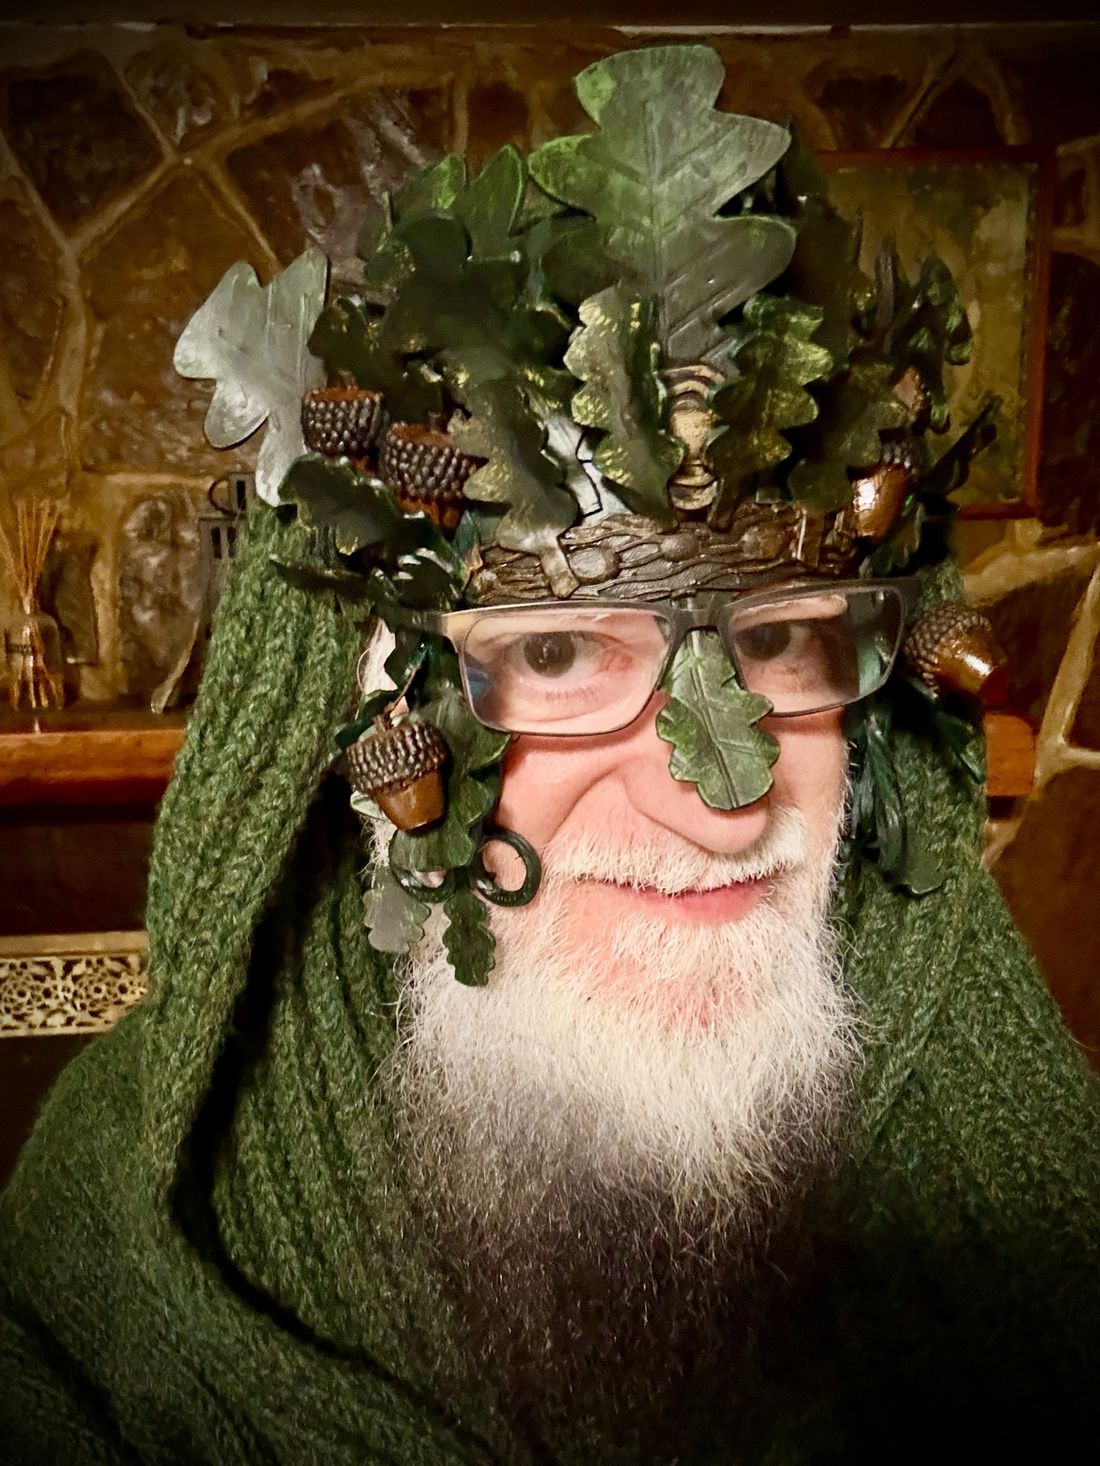
A half-mask of oak leaves, acorns and bark, built for people who wear glasses. The structure is EVA foam with a handful of 3D-printed details, and your glasses go on over it.
- Hands-on time
- about 8 hours over 3 evenings
- Printing
- 16 small parts, printed unattended
- Foam
- 1 base, 27 leaves
- Skills
- craft knife, heat gun, contact cement
Downloads
Tested in use
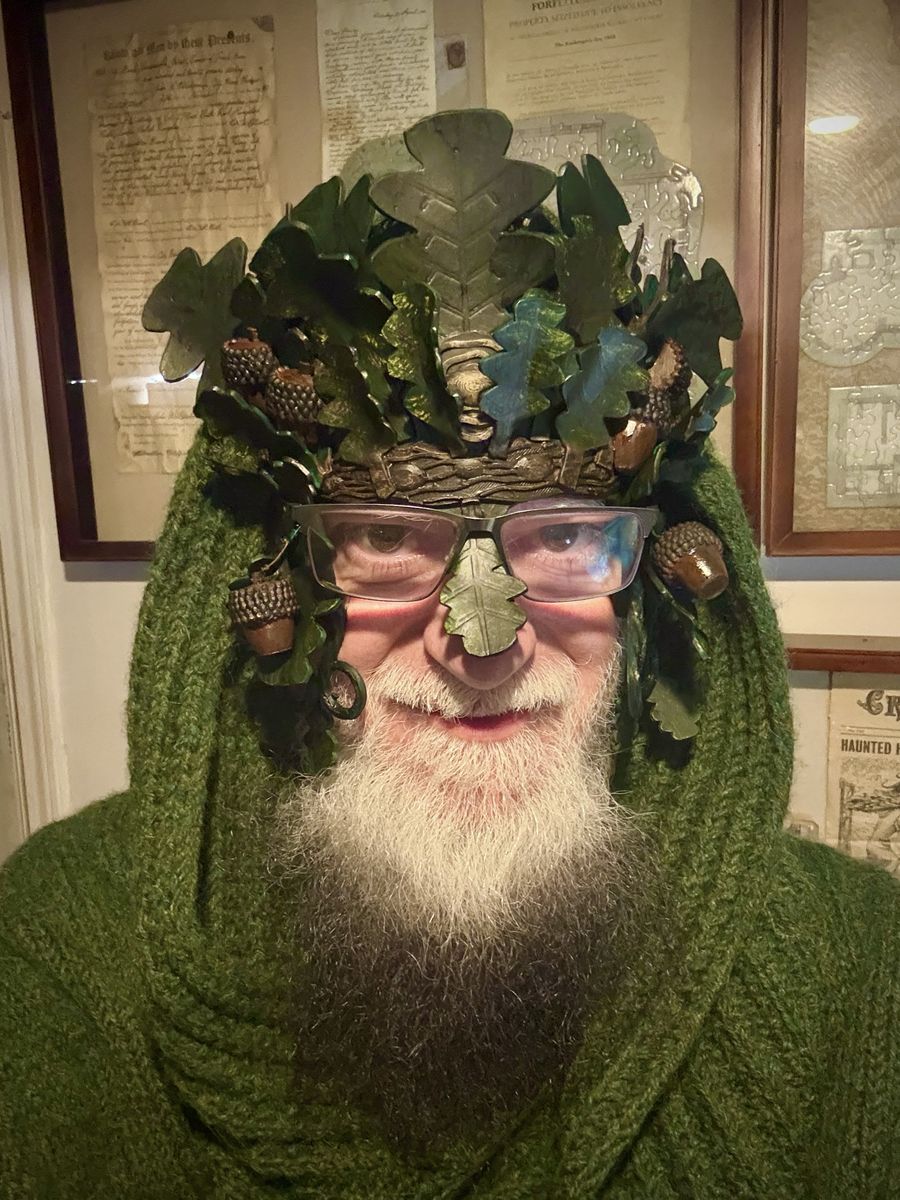
This mask was built and then worn for a full day at a renaissance faire, glasses and all. It stayed comfortable, nothing came loose, and it needed no repairs. The photos throughout this guide are from that build.
The templates and print files have been refined a little since then, so dry-fit the parts against your own base before gluing, as the guide suggests.
How it goes together
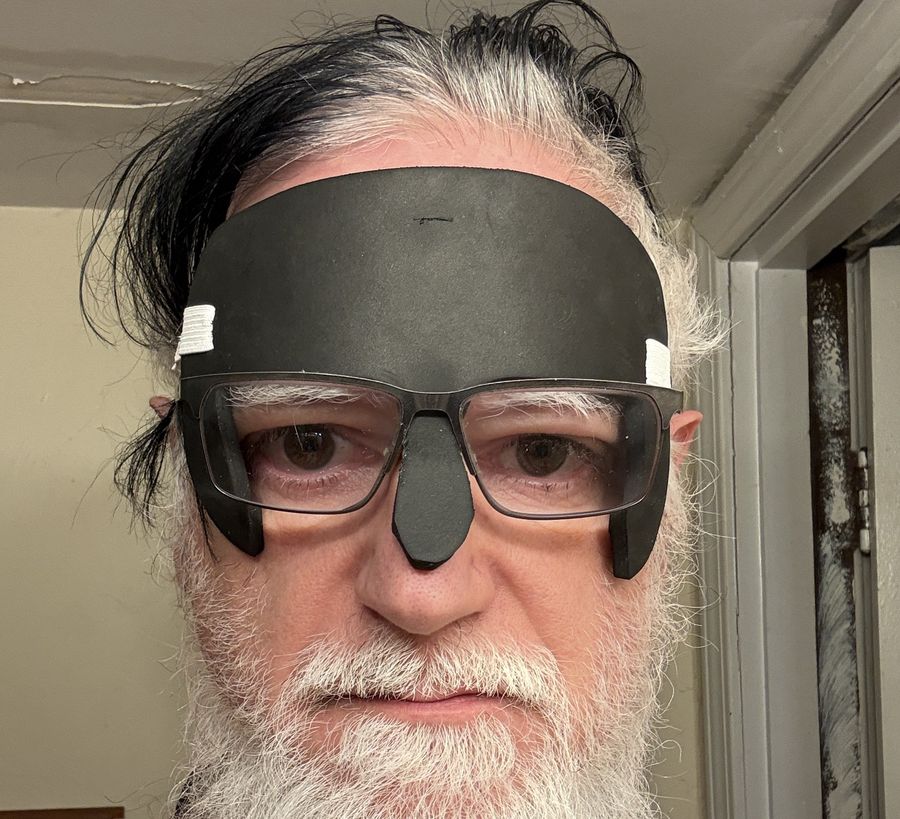
The base is a band of 6 mm foam across the forehead with a strip down the nose and a tab on each cheek. It is worn behind your glasses, so the frame rests on the foam and nothing surrounds the lenses.
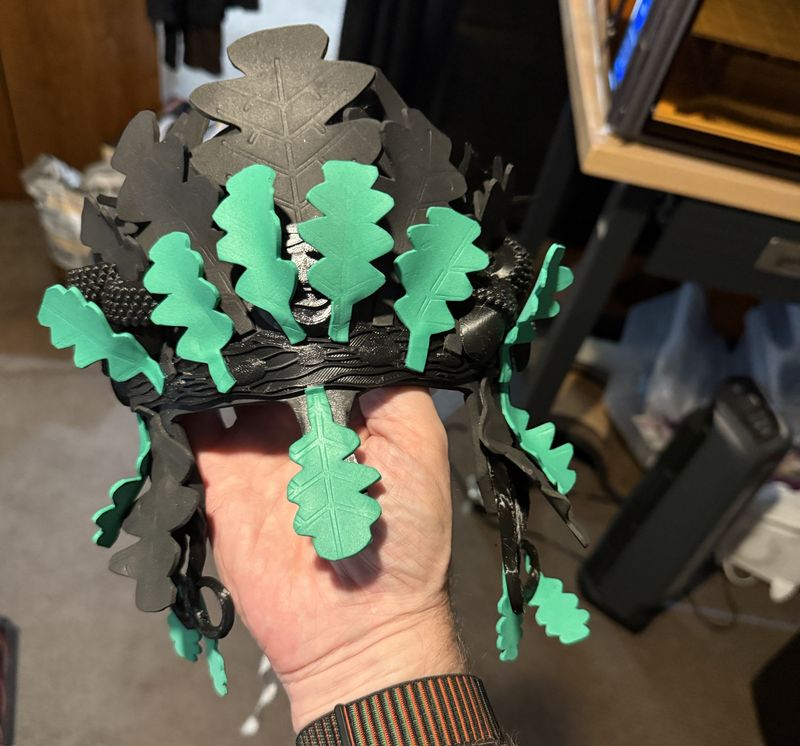
Everything else is glued to that band in layers. Seven large leaves stand up from the band and rake back over the head: the four outer ones glued to its back face, the three centre ones to its front. A printed bark strip sits across the front, and a knot covers the centre stems. Two twigs and a row of medium leaves stand in front of the large ones. Acorns cover the strap anchors at the temples. Leaves and tendrils hang from the cheek tabs into the beard.
Assembly order follows from what overlaps what. Each step says why it comes where it does.
Materials and tools
| Material | How much | Used for |
|---|---|---|
| 6 mm EVA foam | one piece 21 × 15 cm | base |
| 2 mm EVA foam | about 1,250 cm² laid out tightly; one 30 × 45 cm sheet, or three letter-size sheets | 27 leaves, 2 strap patches |
| PLA filament | about 90 g | 16 parts and the vein stamp |
| Flat elastic, 19 mm (¾ in) wide | 60 cm; add 30 cm for the optional top strap | strap |
| Fishing line, or thin floral wire | 20 cm | hanging acorns |
| Painter’s tape | masking the strap before sealing | |
| Contact cement | small can; Barge or Weldwood original, not the gel or water-based kind | foam to foam, printed parts to foam |
| Hot glue, high-temperature | 4 to 5 sticks | leaf stems, elastic tails, hanging lines |
| Card stock | 4 sheets | templates |
| 120-grit sandpaper, rubbing alcohol | roughing and cleaning printed parts before gluing |
Tools. Craft knife with spare blades, cutting mat, heat gun, hot-glue gun, a small brush for the cement, silver or white pen for tracing on dark foam, a pin, scissors, a heat-proof glove, two towels, ruler. A printer for the templates and a 3D printer with a bed of at least 150 × 135 mm.
Paint and sealer are listed in the painting guide.
Everything you will make
This list is complete, and every item on it ends up on the mask. The only extras are three spare leaves, which you keep unpainted for repairs.
| Qty | Part | Made from | Where it goes |
|---|---|---|---|
| 1 | Mask base | 6 mm EVA foam | everything is glued to it |
| 2 | Strap reinforcement patch | 2 mm EVA foam, 30 x 36 mm | back of the band, one behind each strap slit |
| 7 | Large oak leaf, 95 mm | 2 mm EVA foam | 3 crown, centre (on the front), 4 crown, outer (on the back) |
| 9 | Medium oak leaf, 70 mm | 2 mm EVA foam | 6 crown, front row, 2 cheeks, 1 spare |
| 7 | Small oak leaf, 48 mm | 2 mm EVA foam | 4 cheeks, 1 nose, 2 spare |
| 4 | Tip leaf, 30 mm | 2 mm EVA foam | 4 tendril ends |
| 1 | Brow strip | brow_strip.stl | 1 front of the band |
| 1 | Bark knot | bark_knot.stl | 1 centre of the band |
| 2 | Forked twig | twig_forked.stl | 2 in the crown, between the leaf rows |
| 4 | Acorn, large half | acorn_large_half.stl | 4 temple clusters |
| 2 | Acorn, small half | acorn_small_half.stl | 2 temple clusters |
| 2 | Acorn, full (hangs on a line) | acorn_full.stl | 2 hanging beside the cheeks |
| 4 | Tendril spiral | tendril_spiral.stl | 4 on the lower cheek tabs, 2 per side |
| 1 | Elastic strap, 19-25 mm wide | flat elastic, about 45 cm | through both slits and around the back of the head |
| 2 | Hanging line, 8 cm | fishing line or thin wire | one for each hanging acorn |
Plan your time
| When | What | Hands-on |
|---|---|---|
| Evening 1 | Start the print (stamp and brow strip first). Print the templates, paper-fit the base, cut and heat-form it. Fit the strap. | 1½ h |
| Evening 2 | Cut, vein and curl the 27 leaves. Clean up the printed parts and heat-form the brow strip. | 2 h |
| Evening 3 | Assemble (11 steps). Seal and paint, following the painting guide. Hang overnight. | 2 h + 3 h |
| Next morning | Finger-test the paint, pack the spare leaves and a small glue gun, wear it. | 5 min |
Printing takes the longest, though none of the evening 1 work or the leaf cutting waits on it. Start it first and let it run. If a print fails overnight you still have a day of slack.
Stage A · Print
| File | Size | Supports | Notes | |
|---|---|---|---|---|
brow_strip.stl | 1 | 136 × 23.6 × 4.9 mm | none | Prints flat; heat-formed to the forehead later. PLA only. |
bark_knot.stl | 1 | 42 × 42 × 14.2 mm | none | Flat back. |
twig_forked.stl | 2 | 92.9 × 43.1 × 7.6 mm | none | Flat underside along its whole length. |
acorn_large_half.stl | 4 | 29.7 × 37 × 14.9 mm | none | Lies on its flat back. |
acorn_small_half.stl | 2 | 21.6 × 29 × 10.8 mm | none | Lies on its flat back. |
acorn_full.stl | 2 | 27 × 27 × 31 mm | none | Stands on a 13 mm flat, stem up. Use a brim. |
tendril_spiral.stl | 4 | 64.9 × 25.9 × 6.8 mm | none | Flat underside along its whole length. |
leaf_vein_stamp.stl | 1 | 50 × 121 × 4.2 mm | none | A tool for the leaves. Print it first. |
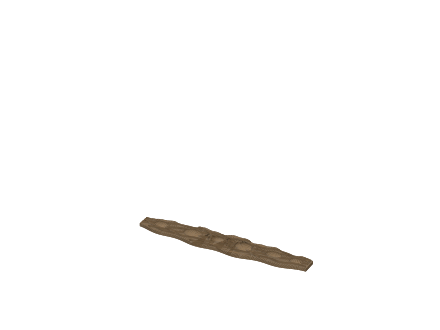
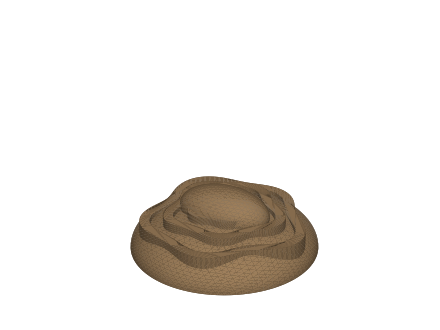
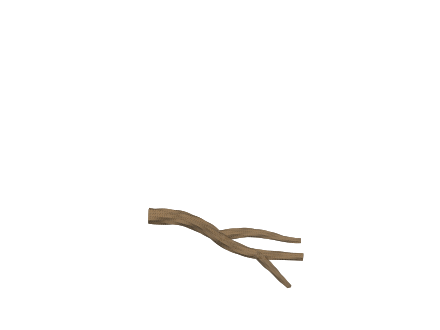
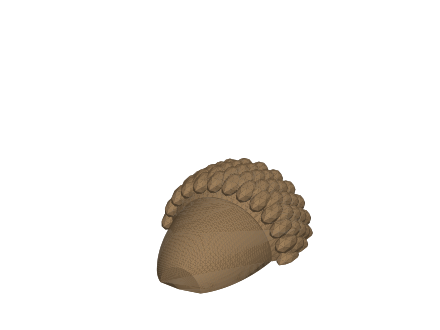
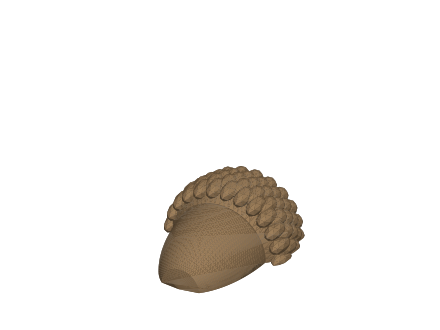
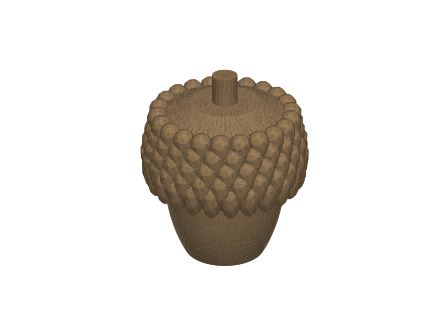
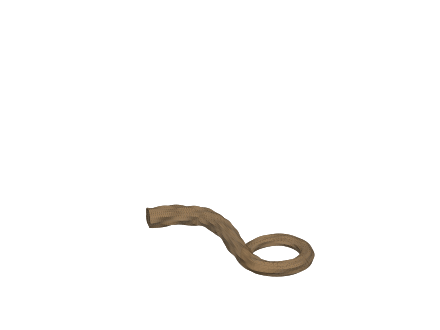
Settings. PLA, 0.4 mm nozzle, 0.2 mm layers, 3 walls, 15% infill, brim on. No supports on anything. For the brow strip use 4 top and bottom layers, because it has to bend later without snapping.
Print order. First the vein stamp and the brow strip, so the leaf work is never waiting on the printer. Then everything else, on as many plates as your bed needs. Expect the full set to take most of a day on a slow printer.
Scaled your base? If you print the base template at anything other than 100% (see Stage B), scale brow_strip.stl by the same percentage in the slicer.
Every part has a flat underside along its full length. If your slicer shows any part of a model floating above the bed, the model has been rotated, so lay it back on its flat face.
Stage B · Base
- Print the template pages on card stock at 100%. Measure the 100 mm bar on every page before cutting anything.
- Paper fit. Cut the base out of paper, hold it to your face and put your glasses on over it. The band should lie on your forehead with the frame’s top bar along its lower edge, the nose strip should drop between the nose pads, and each cheek tab should sit outside the frame with the arm passing over it. If your frame is not close to 140 mm wide, reprint the base page only at the scale in its fit table. On that reprint the bar will measure the scaled length (93 mm at 93%), the brow strip must be printed at the same scale, and the distances given in the assembly steps shrink or grow by the same few percent; the drawings still show where everything goes.
- Trace onto 6 mm foam and cut with the blade upright. Fold the template on its centre line and cut both halves together if you want exact symmetry.
- Heat-form. Warm the band with the heat gun for a few seconds at a time and press it to your forehead (through a cloth) until it holds the curve. Do the same to bend each cheek tab in against your cheekbone.
- Score the back of the nose strip lightly where it meets the band, so it drapes down your nose.
- Put it on under your glasses again. It should sit there on its own for a moment before it slides.
Stage C · Strap
Strap
- Cut two 30 × 36 mm patches from 2 mm foam (outline on template page 4). Lay the paper base template on the formed foam base and push a pin through both ends of each red slit to mark them on the foam.
- Cement a patch to the back of the band, centred over each pair of pin marks. Coat both surfaces, wait until touch-dry, press. Let it cure at least 30 minutes.
- Cut each slit through band and patch together with a fresh blade: two parallel cuts 20 mm long and 3 mm apart, then lift out the sliver. Cutting through both layers at once is what keeps the slit from stretching.
- Bring the end of the elastic around the outer edge of the band onto the front, and feed it through the slit from front to back. Pull about 50 mm through. The tail comes out on the back; turn it outward and hot-glue it to the underside of the strap, the side that faces your head, just past the edge of the band. Glue elastic to elastic and leave the foam free of glue.
- Do one side, put the mask and your glasses on, pull the strap snug around your head, mark it, then do the other side. Go slightly snug: elastic relaxes over a few hours. This sets the strap length for good; the ends are about to be covered.
Stage D · Leaves
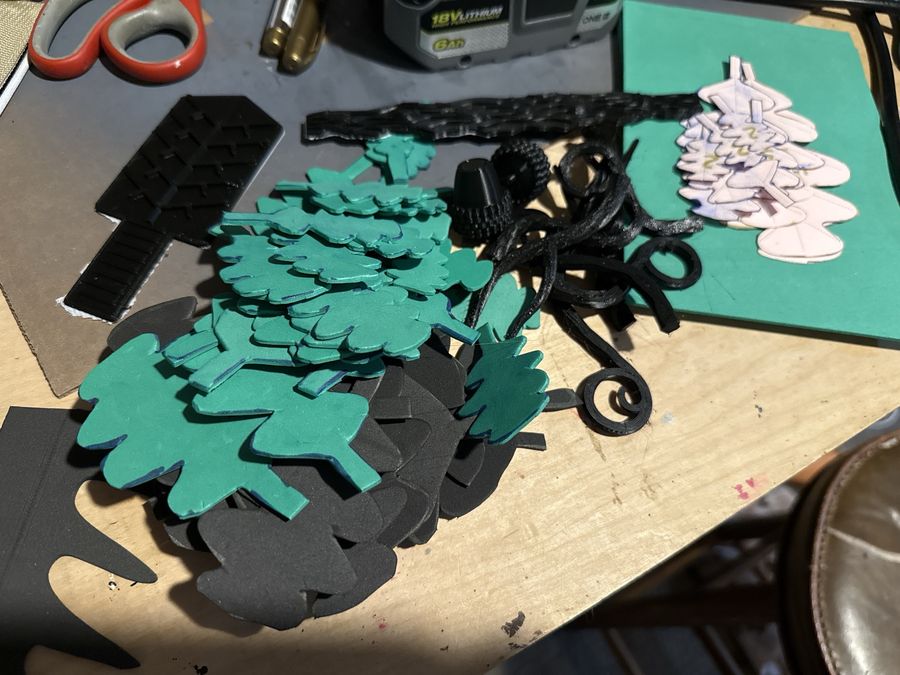
- Trace and cut exactly the numbers printed on the template pages: 7 large, 9 medium, 7 small, 4 tip. Tick the boxes as you go. Turn the card over for every other leaf.
- Veins. Warm a leaf for 3 to 5 seconds until it just goes limp, lay it on a firm surface and press the stamp into it hard for about 5 seconds. For the large leaves stamp the upper and lower halves separately. For small and tip leaves use just the tip end of the stamp. No stamp yet? Score the veins with a ballpoint pen on warm foam.
- Cup and curl while it is still warm: press your thumb along the midrib to cup it, then bend the tip back. Crown leaves get a strong curl; cheek and nose leaves only a slight one. All shaping happens now. Once leaves are glued on, a heat gun would soften the hot glue and the printed parts.
- Sort into piles by where they go: crown, outer (4 large leaves), crown, centre (3 large leaves), front row (6 medium leaves), cheeks (2 medium leaves, 4 small leaves), nose (1 small leaf), tendrils (4 tip leaves), spares (1 medium leaf, 2 small leaves). Put the spares away now, unpainted.
Stage E · Prepare the printed parts
- Snap off the brims. Sand every flat back with 120 grit until it is dull, then wipe with alcohol. Contact cement will not hold on glossy PLA.
- Form the brow strip. Warm it from the back on the gun’s low setting, moving constantly, until it starts to sag (10 to 15 seconds). Lay it on the curved band, press from the centre outward with a gloved hand, and hold for 30 seconds. Bend in stages; forcing the ends cold will crack it. Do not glue it yet.
- Dry-fit everything against the front-view drawing in “How it goes together”: strip, knot, acorns over the strap, a few leaves held in place. A part that does not fit your base is much cheaper to notice now.
Stage F · Assembly
11 steps, about two hours. Hot glue goes on leaf stems, so every blade can still be lifted to reach behind it. The brow strip and acorns are pressed on first, while the mask can still lie flat. The crown is built up after that, starting with the large leaves. Work with glasses within reach; several checks need them.
Brow strip
- The brow strip was heat-formed to the curve of the band in Stage E. Hold it in place dry on the front of the band first: centred, lower edge about 5 mm above the lower edge of the band, each end stopping just short of a strap slit.
- Brush contact cement on the back of the strip and on the band where it sits. Wait about 10 minutes until both are touch-dry.
- Press on from the centre outward, backing the band with your other hand. You get one try; contact cement grabs at once.
- After strap: the strip is pressed on hard; do it while the band is bare and can be backed with your hand.
Acorn clusters
- One cluster per temple, covering the 20 mm of strap that crosses the front of the band. Contact cement holds on the elastic as well as on the foam.
- Acorn 1 (large): flat on the band over the strap, cap pointing up and slightly out, with its inboard edge on bare foam. Acorn 2 (large): above and inboard of it, tilted the other way, leaning on acorn 1. Acorn 3 (small): outboard, bridging the two.
- Keep the whole cluster at least 4 mm above the lower edge of the band. The glasses arm rests just below.
- Press each one with your hand behind the band.
- After strap: the clusters cover the strap where it crosses the front of the band.
- After brow strip: the clusters butt against the ends of the strip.
Crown, centre large leaves
- Rest the mask face-up over a rolled towel. The three centre leaves glue by their stems to the front of the band, in the upper middle where the knot will go later.
- Leaf 1 stands upright on the centre line with its blade starting level with the top edge of the band. It is the tallest leaf on the mask.
- Leaves 2 and 3 go 17 mm to each side of it, leaning out 10°, and about 6 mm lower.
- Hold each leaf raked back about 30° over where your head will be until its glue has cooled, because this is the only chance to set the lean.
- If you fitted the optional top strap, glue the stem of leaf 1 just to one side of it.
- From here on, never rest the mask on its crown. Lay it over a rolled towel, or hang it by the strap.
- After brow strip: their stems sit on the front of the band above the strip.
- After acorn clusters: the clusters are pressed on hard, which is easier before any leaves stand on the band.
Crown, outer large leaves
- Turn the mask face-down over the rolled towel, with the centre leaves hanging clear of it. The four outer large leaves glue by their stems to the back of the band, leaf faces toward the front.
- Leaves 1 and 2: one 36 mm to each side of the centre line, leaning out 22°. Set them so the leaf blade starts level with the top edge of the band.
- Leaves 3 and 4: 52 mm each side, leaning out 30°, and 10 mm lower on the band.
- Keep every stem inboard of the strap patches. Rake each leaf back to match the centre three and hold it until the glue has cooled. Their inner edges tuck behind the edges of the centre leaves.
- After crown, centre large leaves: the centre leaves set the height and rake that the outer ones are matched to.
Bark knot
- Turn the mask face-up again. The knot sits on the front of the band at the centre line, on top of the three centre stems, with its lower edge touching the top edge of the brow strip. It overhangs the top edge of the band by about 14 mm, which is intended.
- Brush contact cement on the back of the knot and on the stems and foam it will cover. Wait until touch-dry.
- Press it on with your other hand flat behind the band. No stems are glued to the back at the centre, so the band can be backed properly.
- After crown, centre large leaves: the knot sits on top of the three centre stems and hides them.
- After brow strip: its lower edge touches the top edge of the strip.
Twigs
- Mask face-up over the rolled towel. The twigs are flat on one side, and that flat side goes against the foam with the bark facing out.
- Each twig stands on the front of the band, its thick end just above the brow strip and about 30 mm out from the centre line, beside the knot. Roughly 22 mm of it lies on the band.
- Cement that lower part to the band. Above the band the twig lies against the front of the large leaves, so add one dab of hot glue where it touches a leaf to stop it rattling.
- The forked ends should reach up between the leaves. The front row goes on later and covers the thick ends.
- After crown, outer large leaves: each twig lies up the front of the large leaves, so all seven need to be in place.
Crown, front row
- Six medium leaves, stems glued to the front of the band in the space directly above the brow strip, either side of each twig.
- Leaves 1 and 2: either side of the knot, about 24 mm from the centre line, leaning out 12°. Their inner lobes rest on the sides of the knot; the middle of the knot stays visible between them.
- Leaves 3 and 4: 42 mm out, leaning 27°, their blades crossing in front of the twigs. Leaves 5 and 6: 58 mm out, leaning 42°, with their blades resting on the inner edge of each acorn cluster.
- Hold each one leaning back toward the large leaves until its glue has cooled. Where a leaf rides up over the knot or an acorn it will stand a little proud, which looks natural.
- After bark knot: the two middle leaves fan around the knot and overlap its sides.
- After acorn clusters: the outer leaves lean over the inner edge of each cluster.
- After twigs: the front-row leaves cover the thick ends of the twigs.
- After crown, centre large leaves: the front row leans back onto the large leaves.
Hanging acorns
- Each full acorn hangs from an 8 cm length of fishing line. Thin wire works just as well. Tie one end around the stem of the acorn, tight under the cap, and lock the knot with a drop of hot glue. With wire, wrap it twice and twist it closed.
- Hot-glue the last 10 mm of the free end to the front of the cheek tab, pointing up, on the outer half of the tab about 12 mm below the lower edge of the band. That is just under where the glasses arm rests.
- Lead the line downward and outward from there, so the acorn hangs past the outer edge of the cheek tab, level with the lens. Fishing line lets the acorn swing; wire can be bent to hold it in one place.
- After acorn clusters: so the hanging acorn can be judged against the cluster above it.
Tendrils
- On the bench first: hot-glue the stem of one tip leaf to the curled end of each of the four tendrils.
- Each cheek tab takes two tendrils side by side on the front of its lower third, each glued flat by the first 8 mm of its straight end. Flip the acorn up out of the way while you work.
- Tendril 1 goes on the inner half of the tab and curls toward the nose. Tendril 2 goes on the outer half and curls toward the ear. They fan apart and must not cross. Each one is rigid and 7 mm thick, so a crossed tendril cannot sit flat.
- After hanging acorns: the cheek tab is still bare except for the line, so both tendril stems can be pressed flat.
Cheek leaves
- Three leaves per side, tips down, stems side by side across the top of the cheek tab. Keep the tops of the stems just below the line the glasses arm rests on. Keep the acorn flipped up until all three are on.
- Leaf 1 (medium): centre of the tab, straight down.
- Leaf 2 (small): toward the lens, straight down. Its blade must stay off the glass.
- Leaf 3 (small): toward the ear, tip angled outward about 8°. Its stem and the stem of leaf 1 go over the line and hide the anchor.
- Let the acorn drop. It hangs in front of the outer lobes of leaves 1 and 3. The tendrils hang out below all three.
- After hanging acorns: two of the leaf stems go over the line and hide it.
- After tendrils: the leaf blades hang in front of the tendril stems; glued first, the leaves would be in the way.
Nose leaf
- One small leaf, tip down, on the front of the nose strip of the base. The stem glues at the very top of the nose strip and runs up under where the bridge of the glasses sits.
- The leaf is wider than the nose strip, so its side lobes hang free and show at the inner corners of the lenses, as in the photos. If that bothers you, trim the two widest lobes.
- Press it to follow the curve of your nose while the glue is warm.
- After brow strip: its stem sits just under the brow strip.
Final fit
- Put it on, then your glasses. Walk around, look down, shake your head.
- Both glasses arms sit flat and pass under the acorn clusters.
- Nothing presses on a lens. (The side lobes of the nose leaf do show at the inner corners.)
- The crown does not nod forward. If it does and you fitted the top strap, shorten it a little.
- Flex the crown gently and look for any leaf that moves at its stem. Re-glue it now.
Then go to the painting guide. Nothing more is glued on after sealing.
If something is off
| Problem | Fix |
|---|---|
| Mask nods forward | Shorten the top strap if you fitted one. If not, it cannot be added now; unpick one strap tail at the back and re-glue it 10 mm shorter so the band grips higher on the forehead. |
| Glasses ride up or rock | The nose strip or the nose-leaf stem is too thick under the bridge. Thin the foam there with a blade or a sanding drum. |
| A cheek tab flares out | Before assembly: reheat its lower corner and hold it against your cheekbone until cool. After assembly: warm only the back of the tab with a hair dryer, never a heat gun. |
| A leaf sits at the wrong angle | Do not reheat it in place. Peel the stem off, reshape the leaf away from the mask, glue it back. |
| Brow strip cracked while forming | It was bent too cold. Glue it down anyway with the crack closed; paint hides it. Or reprint: it is a 35-minute part. |
| A leaf comes off | Use a spare (medium or small; cut a large or tip leaf fresh if you lose one). Hot glue on the stem, then base colour brushed straight onto the foam; good enough for a repair. |
| Frame catches under the band | Shave a shallow groove along the back of the band where the top bar crosses it. |
Without glasses
It is the same band, nose strip and cheek tabs, joined under the eyes, with two 46 × 24 mm eye holes 64 mm apart. Everything in this guide applies unchanged, with three differences: paper-fit by checking you see clearly through both holes; ignore the instructions about glasses arms and lenses; and you may let the cheek leaves and the nose leaf sit a little higher, since no frame is in the way. Keep leaf blades clear of the eye holes.
Painting guide
Painting the mask
Seven simple layers, ordered so that none of them undoes an earlier one. Allow about three and a half hours including drying, then leave it overnight to cure.
- Start with
- the assembled mask, nothing left to glue
- Technique
- dry-brushing and one wash
- Application
- brushed, apart from the sealer and optional varnish
- Finish by
- the evening before you wear it
Paints and brushes
| Paint | Amount | Notes |
|---|---|---|
| Plasti Dip spray, black or grey | 1 can | Sealer. Flexible, so it does not crack when leaves bend. |
| Dark green | most used | Phthalo, Hooker’s or forest green. Base for all leaves, tendrils and foam. |
| Mid green | Sap green or similar. The main leaf colour. | |
| Yellow-green | a little | Mid green plus yellow. Leaf highlights. |
| Dark brown (burnt umber) | Base for bark and acorns, and thinned for the wash. | |
| Warm brown | a little | Burnt or raw sienna. |
| Tan or old gold | a little | Ridge tops and acorn caps. |
| Gloss varnish or clear nail polish | a few drops | Acorn nuts. |
| Matte spray varnish | optional | Protects the finish. |
Brushes. A 12 mm flat for base coats, an old stiff 8 mm flat for all the dry-brushing, a 4 mm round for the wash and the gloss. Paper towels, a water cup, a damp rag, a drop of dish soap for the wash, painter’s tape. Ordinary craft acrylics are fine.
Why this order
- Sealer goes on first. Paint soaks into bare foam and flakes off bare PLA.
- Dark base coats come before anything light, since dry-brushing only shows over a darker colour.
- Highlights go on before the wash. If a highlight came out too strong, the wash softens it.
- The tall centre leaves get one more highlight after the wash, because the wash flattens them most.
- Gloss is the last thing on, as either the wash or a matte varnish would dull it.
One medium leaf through five of the stages:
Every surface, every stage
Tick down each column as you finish a stage. If a row has an entry in the column, that surface gets paint in that stage.
| Surface | 1 Seal | 2 Base | 3 Mid-tone | 4 Highlight | 5 Bark | 6 Wash | 7 After |
|---|---|---|---|---|---|---|---|
| Crown, large leaves (7 large leaves) | ✓ | dark green | 1 light pass | veins, notches | top lobes of the 3 centre leaves | ||
| Crown front row (6 medium leaves) | ✓ | dark green | 2 to 3 passes | edges, veins | veins, notches, overlaps | ||
| Cheek leaves (2 medium leaves, 4 small leaves) and nose leaf | ✓ | dark green | 2 to 3 passes | edges, veins | veins, notches | ||
| Tip leaves (4) | ✓ | dark green | 2 to 3 passes | tips | light | ||
| Tendrils (4) | ✓ | dark green | tops only | the curl | inside the curl | ||
| Leaf backs that show from the side | ✓ | dark green | 1 light pass | light | |||
| Foam base: band edges, cheek tabs, nose strip | ✓ | dark green | all over; leave it dark | ||||
| Brow strip | ✓ | dark brown | warm brown, then gold on ridge tops | every groove; wipe ridges fast | |||
| Bark knot | ✓ | dark brown | warm brown, then gold on rings | between rings | gloss dot in the eye | ||
| Twigs (2) | ✓ | dark brown | warm brown on top | light | |||
| Acorn nuts (8) | ✓ | dark brown | warm brown | at the cap line | gloss | ||
| Acorn caps (8) | ✓ | dark brown | gold across the scales | between scales | stay matte | ||
| Elastic where it shows | ✓ | dark brown |
Stages
Seal
- Wrap the part of the strap that goes behind your head in painter’s tape; sealer stiffens elastic. Hang the mask by the strap. Flex apart any two leaves that touch face to face.
- Three mist coats from about 30 cm. Each coat is five short passes: from below looking up into the crown, from above, from the left, from the right, and from behind for the backs of the large leaves. The straight-on front view covers first and matters least. The skin side of the base gets whatever lands on it and is not painted.
- If a surface looks wet you are too close. Wet sealer runs into the overlaps and glues neighbouring leaves into a web.
- Wait 10 to 15 minutes between coats, and each time run a finger between leaves that sit close together to break any bridge.
- After the third coat wait 30 minutes. Bare foam still showing in the deepest pockets is fine: the wash will sit there.
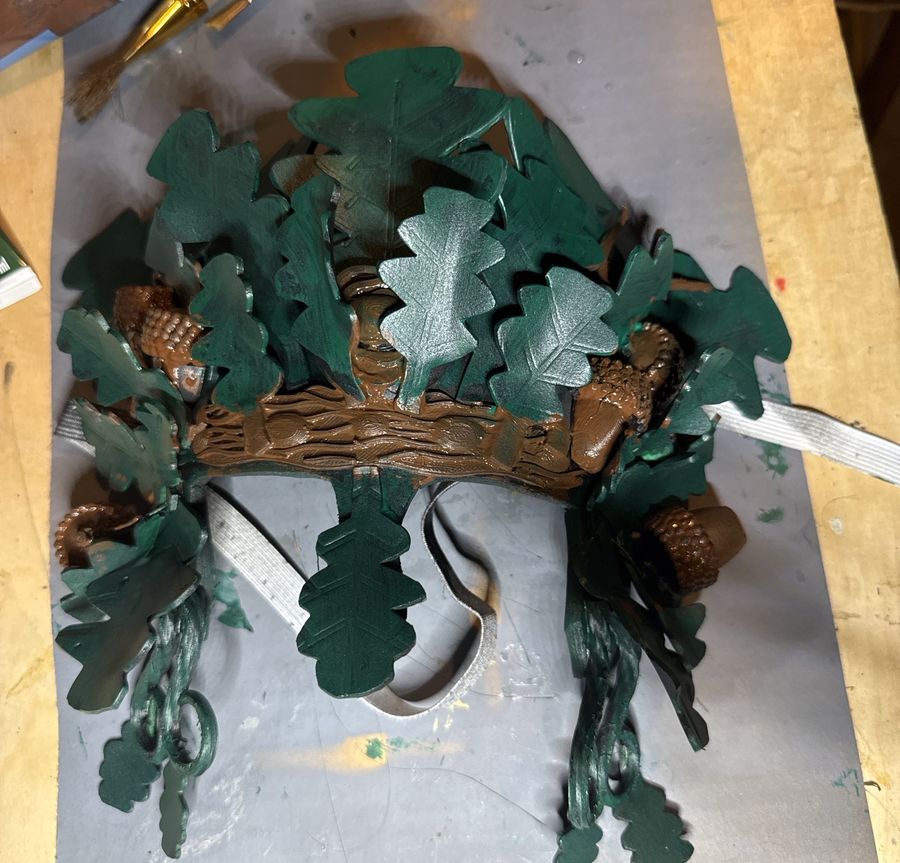
Base coats
- Dark green on every leaf, front and back, on the tendrils and tip leaves, and on all foam you can see: the edges of the band, the cheek tabs, the nose strip.
- Dark brown on the brow strip, the knot, the twigs, every acorn (nut and cap), and the elastic where it shows at the temples.
- Thin the paint a little so it flows, and push the brush under every leaf edge. Two thin coats beat one thick one.
- It can be sloppy, since five more stages go over it.
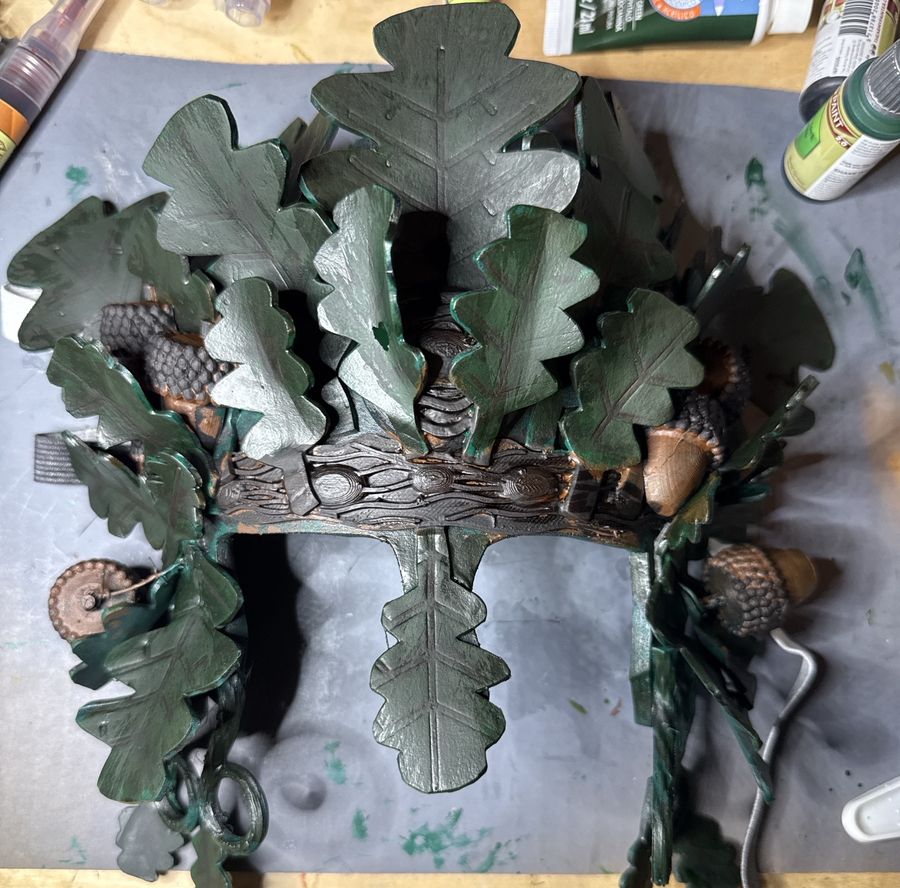
Leaves: mid-tone
- Dry-brush. Load the brush, wipe nearly all the paint off on a paper towel, then drag it lightly across the surface so only the raised parts catch colour. Test on the towel: a stroke should leave almost nothing.
- Brush from stem toward tip on the face of every leaf.
- Large leaves: one light pass. Front row, cheek leaves, nose leaf and tip leaves: two or three passes. That difference gives the crown its depth.
- One light pass along the top of each tendril, and on leaf backs wherever they show from the side.
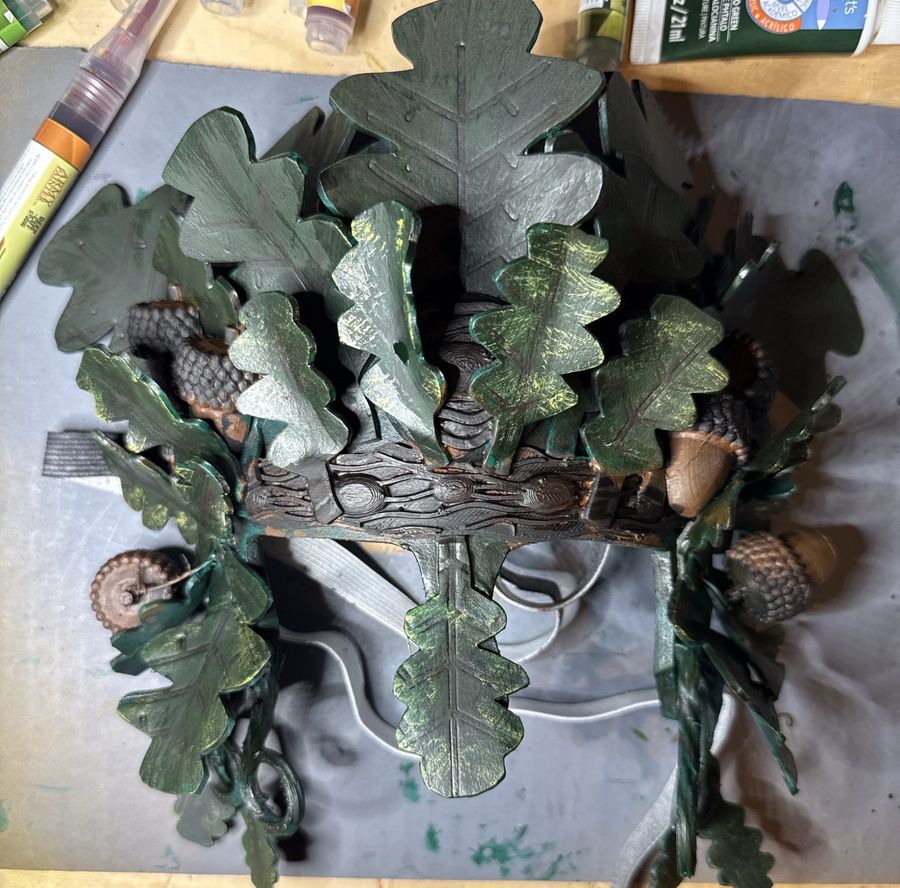
Leaves: highlights
- Forward leaves only: front row, cheek leaves, nose leaf, tip leaves, and the curl of each tendril.
- Drag the nearly dry brush across the lobe tips and along the vein ridges. It should come out streaky, the way light catches a real leaf.
- Leave the large leaves alone for now. They get their highlight after the wash.
- Stop early. If a leaf looks striped there was too much paint on the brush.
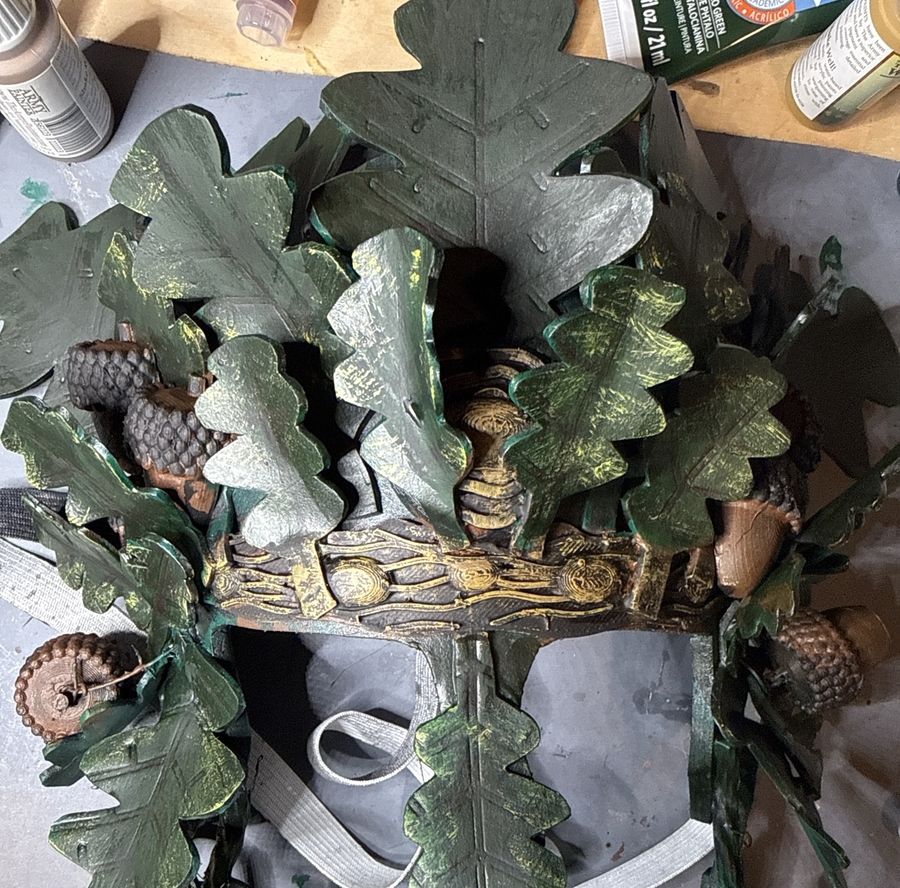
Bark and acorns
- Warm brown dry-brushed over the brow strip, the rings of the knot, the tops of the twigs and the acorn nuts.
- Tan or old gold, drier, on the very tops of the strip’s ridges and knobs, the knot’s rings, and across the acorn caps so it catches each scale.
- No other step changes the mask as much. The strip stops looking like painted plastic and starts to look carved.
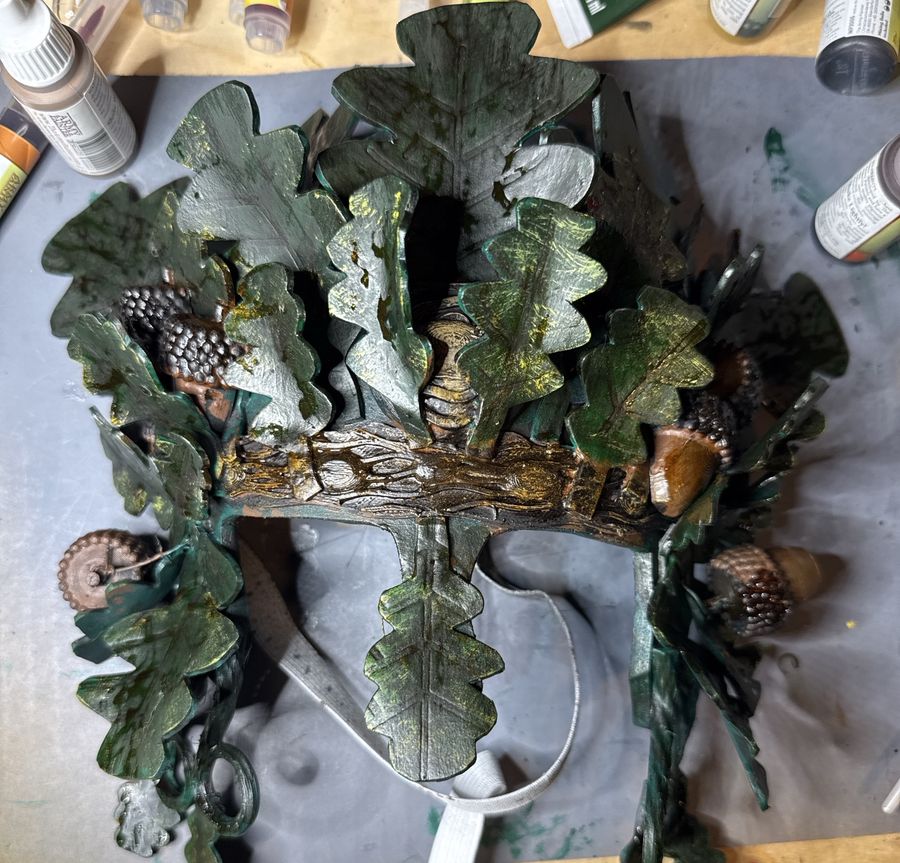
Dark wash
- Flood the wash into every low place: leaf veins and the notches between lobes, under every overlap, the grooves of the strip, around the knot, between acorn scales, where stems meet the band.
- Within a minute, wipe the raised surfaces with the damp rag so the brown stays only in the low places.
- On the strip, wipe the ridge tops promptly to keep the gold. On the foam base and deep under the crown, leave it; those should go dark.
- Do the whole mask in one session so it dries evenly. It looks too contrasty while wet, though it settles as it dries.
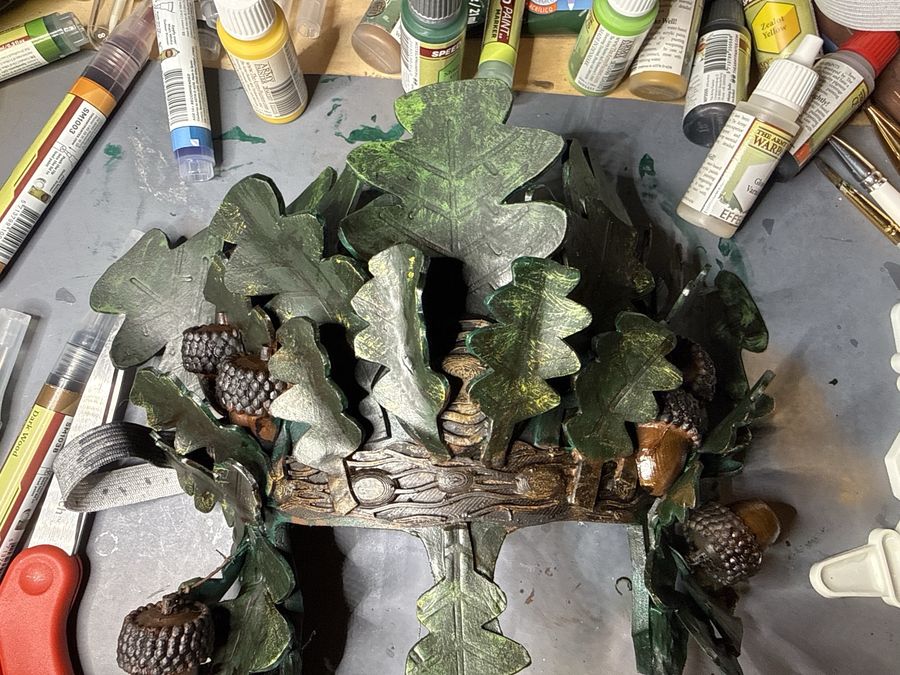
After the wash
- Re-highlight the tall leaves. The wash dulls the large leaves more than the rest. Once it is dry, dry-brush yellow-green down the midrib and across the top lobes of the three centre large leaves. Top halves only.
- Optional, and it must come before the gloss: one light coat of matte spray varnish over the whole mask, to protect the dry-brushing from a hood or scarf. Let it dry.
- Gloss, brushed on last, on the acorn nuts and a dot in the eye of the knot. Caps stay matte.
- Hang by the strap overnight somewhere warm with moving air. Do not lay it down, because leaves set in whatever shape they rest in.
If something is off
| Problem | Fix |
|---|---|
| Leaves stuck together after sealing | Slide a blade between them now. After paint it tears. |
| Dry-brush went on solid | Too much paint. Let it dry, dry-brush the base colour back over it, try again with a drier brush. |
| Wash dried on a raised surface | Scrub with a damp brush within the hour, or dry-brush that surface’s colour back over it. |
| The whole thing looks flat | More contrast between rows: another pass of highlight on the front row only. |
| Paint still tacky in the morning | Thick sealer underneath. An hour in front of a fan before wearing. |